Northern Lights Photography Guide: Camera Settings, Tips and Best Spots in Iceland
Capturing the northern lights in Iceland is as much about understanding the rhythm of the landscape as it is about mastering camera settings. Auroras move according to space weather, yet the way they appear in your photographs depends on light, exposure, composition, and the steadiness with which you approach the night. Iceland’s winter sky is both dramatic and quiet, shifting between full cloud cover and sudden clarity. In these moments, preparation and technique matter.
This guide offers a clear, detailed approach to photographing the auroras in Iceland. It blends scientific foundation with practical instruction, helping you understand how your camera sees the night differently than your eyes do. It also explains how to work with low temperatures, how to select the right lenses, and how positioning yourself in the right location at the right hour elevates every frame. Along the way, you will find thoughtful insight into Iceland’s best viewing regions, shaped by local conditions and the country’s steady winter rhythm.
Whether you are standing along the quiet edge of a lagoon, focusing toward a distant ridge, or waiting for a slow wave of green to brighten into an arc, the approach remains the same: calm preparation, attentive technique, and patience for the sky to open.
Understanding How the Camera Sees the Aurora?
Human eyes and digital cameras perceive the northern lights very differently. In low light, our eyes rely on rod cells that detect brightness but not vibrant colors. Cameras, on the other hand, capture light over time, making auroras appear brighter and more colorful in photos than they do in person.
Two key principles ensure a great aurora photo:
1. Your camera needs time to capture light: This is managed by adjusting the shutter speed. A longer exposure allows the sensor to collect enough light to reveal the shapes and colors of the auroras.
2. Your camera needs to stay steady: This is where a tripod comes in. Even the slightest movement can make your image blurry.
Understanding how seeing and photographing auroras differ helps set the right expectations. The goal isn’t to perfectly replicate what you see but to translate the sky into a well-balanced, properly lit image.
Essential Camera Settings for Aurora Photography
While every night is different, a baseline set of settings offers a reliable starting point. From there, you adjust according to brightness, movement, and ambient conditions.
1. Shoot in Manual Mode
Manual mode gives you full control over shutter speed, aperture, and ISO. Automatic settings cannot interpret the aurora’s low-light environment.
2. Shutter Speed: 2 to 12 Seconds
The correct exposure time depends on how fast the auroras move.
- Slow, faint auroras: 10 to 12 seconds
- Medium movement: 6 to 8 seconds
- Fast, bright auroras: 2 to 4 seconds
Longer exposures create smooth, blended shapes. Shorter exposures preserve detail when the lights move quickly.
3. Aperture: f/1.4 to f/2.8
A wide aperture allows more light into the lens. A setting between f/1.4 and f/2.8 is ideal.
If your lens does not open wider than f/4, you can still capture auroras, but you must increase ISO or lengthen exposure time.
4. ISO: Begin at 800 to 3200
ISO controls how sensitive your camera sensor is to light. Higher ISO introduces noise, but modern cameras handle noise well when properly exposed.
Typical ISO ranges:
- Dark nights with faint auroras: ISO 2000–3200
- Moderate brightness: ISO 1600
- Strong auroras or moonlit nights: ISO 800–1200
5. Focus Manually
Autofocus struggles in low light. Manual focus is essential.
Steps to focus accurately:
- Switch the lens to manual focus.
- Use live-view mode.
- Magnify a bright star, distant house light, or moon.
- Adjust until the point becomes crisp and sharp.
- Do not touch the focus ring again.
Many lenses focus slightly past infinity, so do not rely on the infinity mark.
6. Shoot in RAW Format
RAW preserves maximum detail and flexibility. It allows you to adjust exposure, noise, and color in post-processing without degrading image quality.
7. White Balance: 3400K to 4000K
A cool white balance enhances the green tones of the aurora.
If unsure, set white balance to auto and correct it later in RAW editing.
8. Reduce Vibrations Before Shooting
- Turn on a 2-second timer.
- Use a remote shutter if available.
- Disable image stabilization when using a tripod.
These small adjustments prevent blur.
Choosing the Right Lens for Northern Lights Photography
Your choice of lens significantly shapes how you capture and interpret the vast night sky. A wide and fast lens is your best tool for aurora photography, as it allows you to capture a broader perspective. This means you can include more of the landscape, a wider stretch of the horizon, and the full, sweeping expanse of the auroral arcs as they dance across the sky.
Ideal Focal Lengths:
To achieve that expansive view, certain focal lengths are particularly effective depending on your camera's sensor size:
- 14mm to 24mm for full-frame cameras
- 10mm to 18mm for APS-C (crop sensor) cameras
- 7mm to 12mm for Micro Four Thirds systems
These wide-angle focal lengths are crucial because they create the necessary space within your composition to include compelling foreground elements. By incorporating features like mountains, lagoons, rivers, or coastal cliffs, you add context and scale to your images, making them far more dynamic.
Lens Speed and Aperture:
The "speed" of your lens, determined by its maximum aperture, is critical. A lens with a wide aperture like f/1.4, f/1.8, or f/2.8 will perform exceptionally well under Iceland’s dark, remote skies. The ability to open the aperture wider lets in significantly more light. This extra brightness has two key benefits: it helps reduce the digital noise that can appear at high ISO settings and allows you to use faster shutter speeds, which keeps the stars sharp and the aurora's details crisp.
Prime vs. Zoom Lenses:
When deciding between a prime and a zoom lens, consider the trade-offs:
- Prime lenses have a fixed focal length and are generally known for delivering sharper images and offering wider maximum apertures (like f/1.4 or f/1.8). They are often the superior choice when absolute image quality and low-light performance are your top priorities.
- Zoom lenses provide the flexibility to change your focal length without moving, which is a major advantage when composing shots that include varied foreground elements like mountains or coastlines.
Both types of lenses can produce beautiful results. However, for capturing the Northern Lights, prime lenses are often preferred because their optical clarity and strength in low-light conditions are perfectly suited to the challenge.
Composition Techniques for Strong Aurora Photographs
An aurora photograph is shaped by more than just color. While the vibrant greens and purples of the aurora might grab attention, it’s the composition—the foreground, the horizon line, and the subtle elements framing the light—that elevates a simple sky photo into a truly meaningful image. Here are some tips to create aurora photographs that stand out.
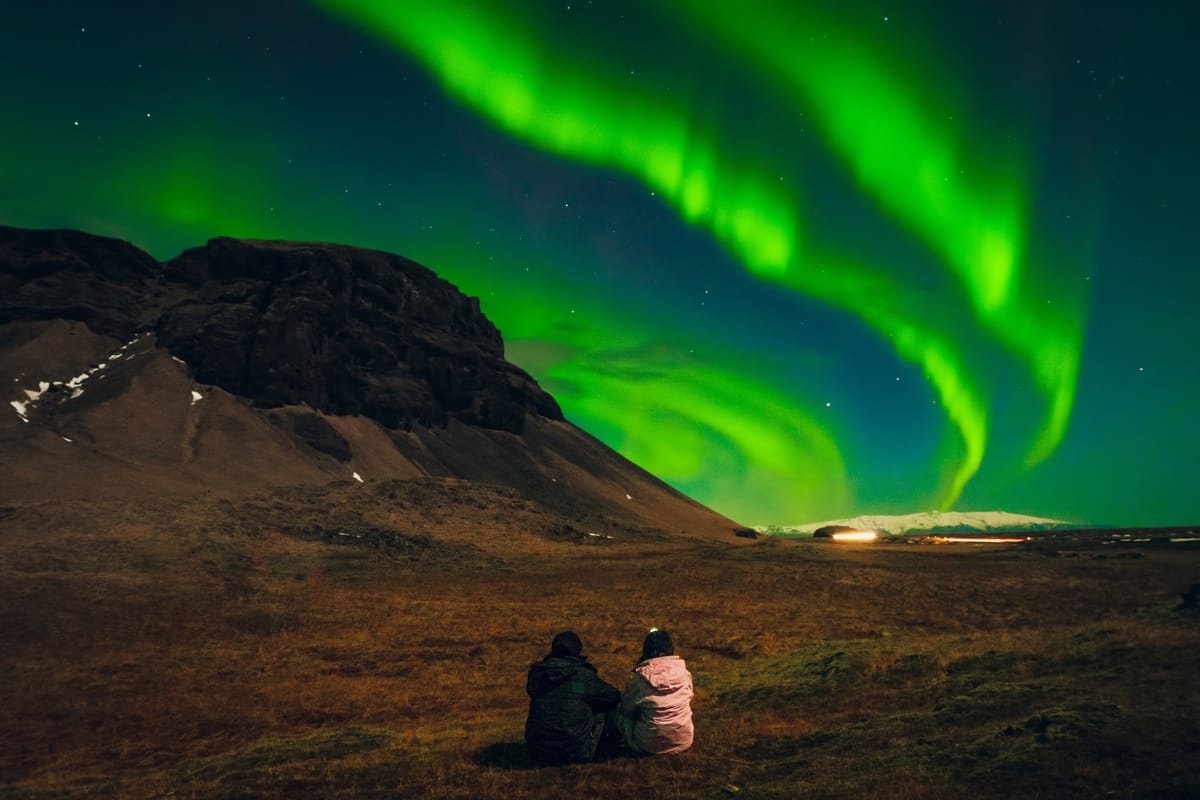
1. Anchor the Frame With a Foreground
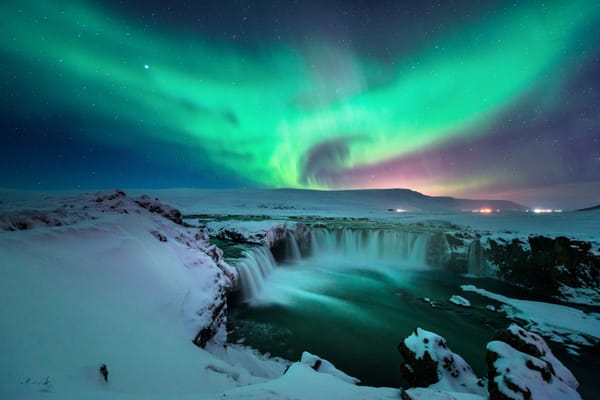
Foreground elements add depth, context, and a sense of place to your aurora shots. They help ground the ethereal lights in a real-world setting, creating a connection between the sky and the land below. Think about incorporating features like snow-covered lava fields, black-sand beaches, or cascading waterfalls. Other striking options include ice formations, rugged coastal cliffs, carefully balanced rock cairns, or shimmering reflections on still lagoons. These elements not only give scale to the aurora but also make the image feel more intentional and immersive.
2. Respect the Horizon Line
A straight horizon line is critical in landscapes, especially in a place like Iceland where the vast, open landscapes naturally draw the eye. A tilted horizon can make even the most stunning aurora display feel chaotic or rushed. Take an extra moment to ensure the horizon is level—this small adjustment can make a big difference in how balanced and professional your photo appears.
3. Use Leading Lines
Incorporating leading lines into your composition helps guide the viewer’s eye naturally toward the aurora, enhancing the sense of flow and direction in your image. Roads winding through the landscape, rivers cutting through valleys, shorelines curving along the coast, or ridges tracing the contours of mountains—all of these can serve as visual pathways. These elements create a sense of movement and invite viewers to explore the photo, making the aurora the focal point in an engaging way.
4. Capture Movement
Auroras are dynamic, shifting from still arcs to active curtains and swirling shapes in moments. Capturing their movement often requires careful adjustments to your shutter speed. For smooth, silky waves that give a dreamy quality to the lights, use longer exposures. On the other hand, to capture crisp, sharp details of the aurora’s intricate patterns, opt for shorter exposures. Pay attention to the aurora’s pace and adapt your settings accordingly to highlight its unique behavior.
5. Work With Reflections
A calm body of water can double the impact of the aurora, creating a mirror effect that amplifies the beauty of the scene. Look for lagoons, coastal pools, or even small ponds where the water is still enough to reflect the sky clearly. On winter nights, these natural mirrors can add symmetry and balance to your composition, turning a good photo into a breathtaking one.
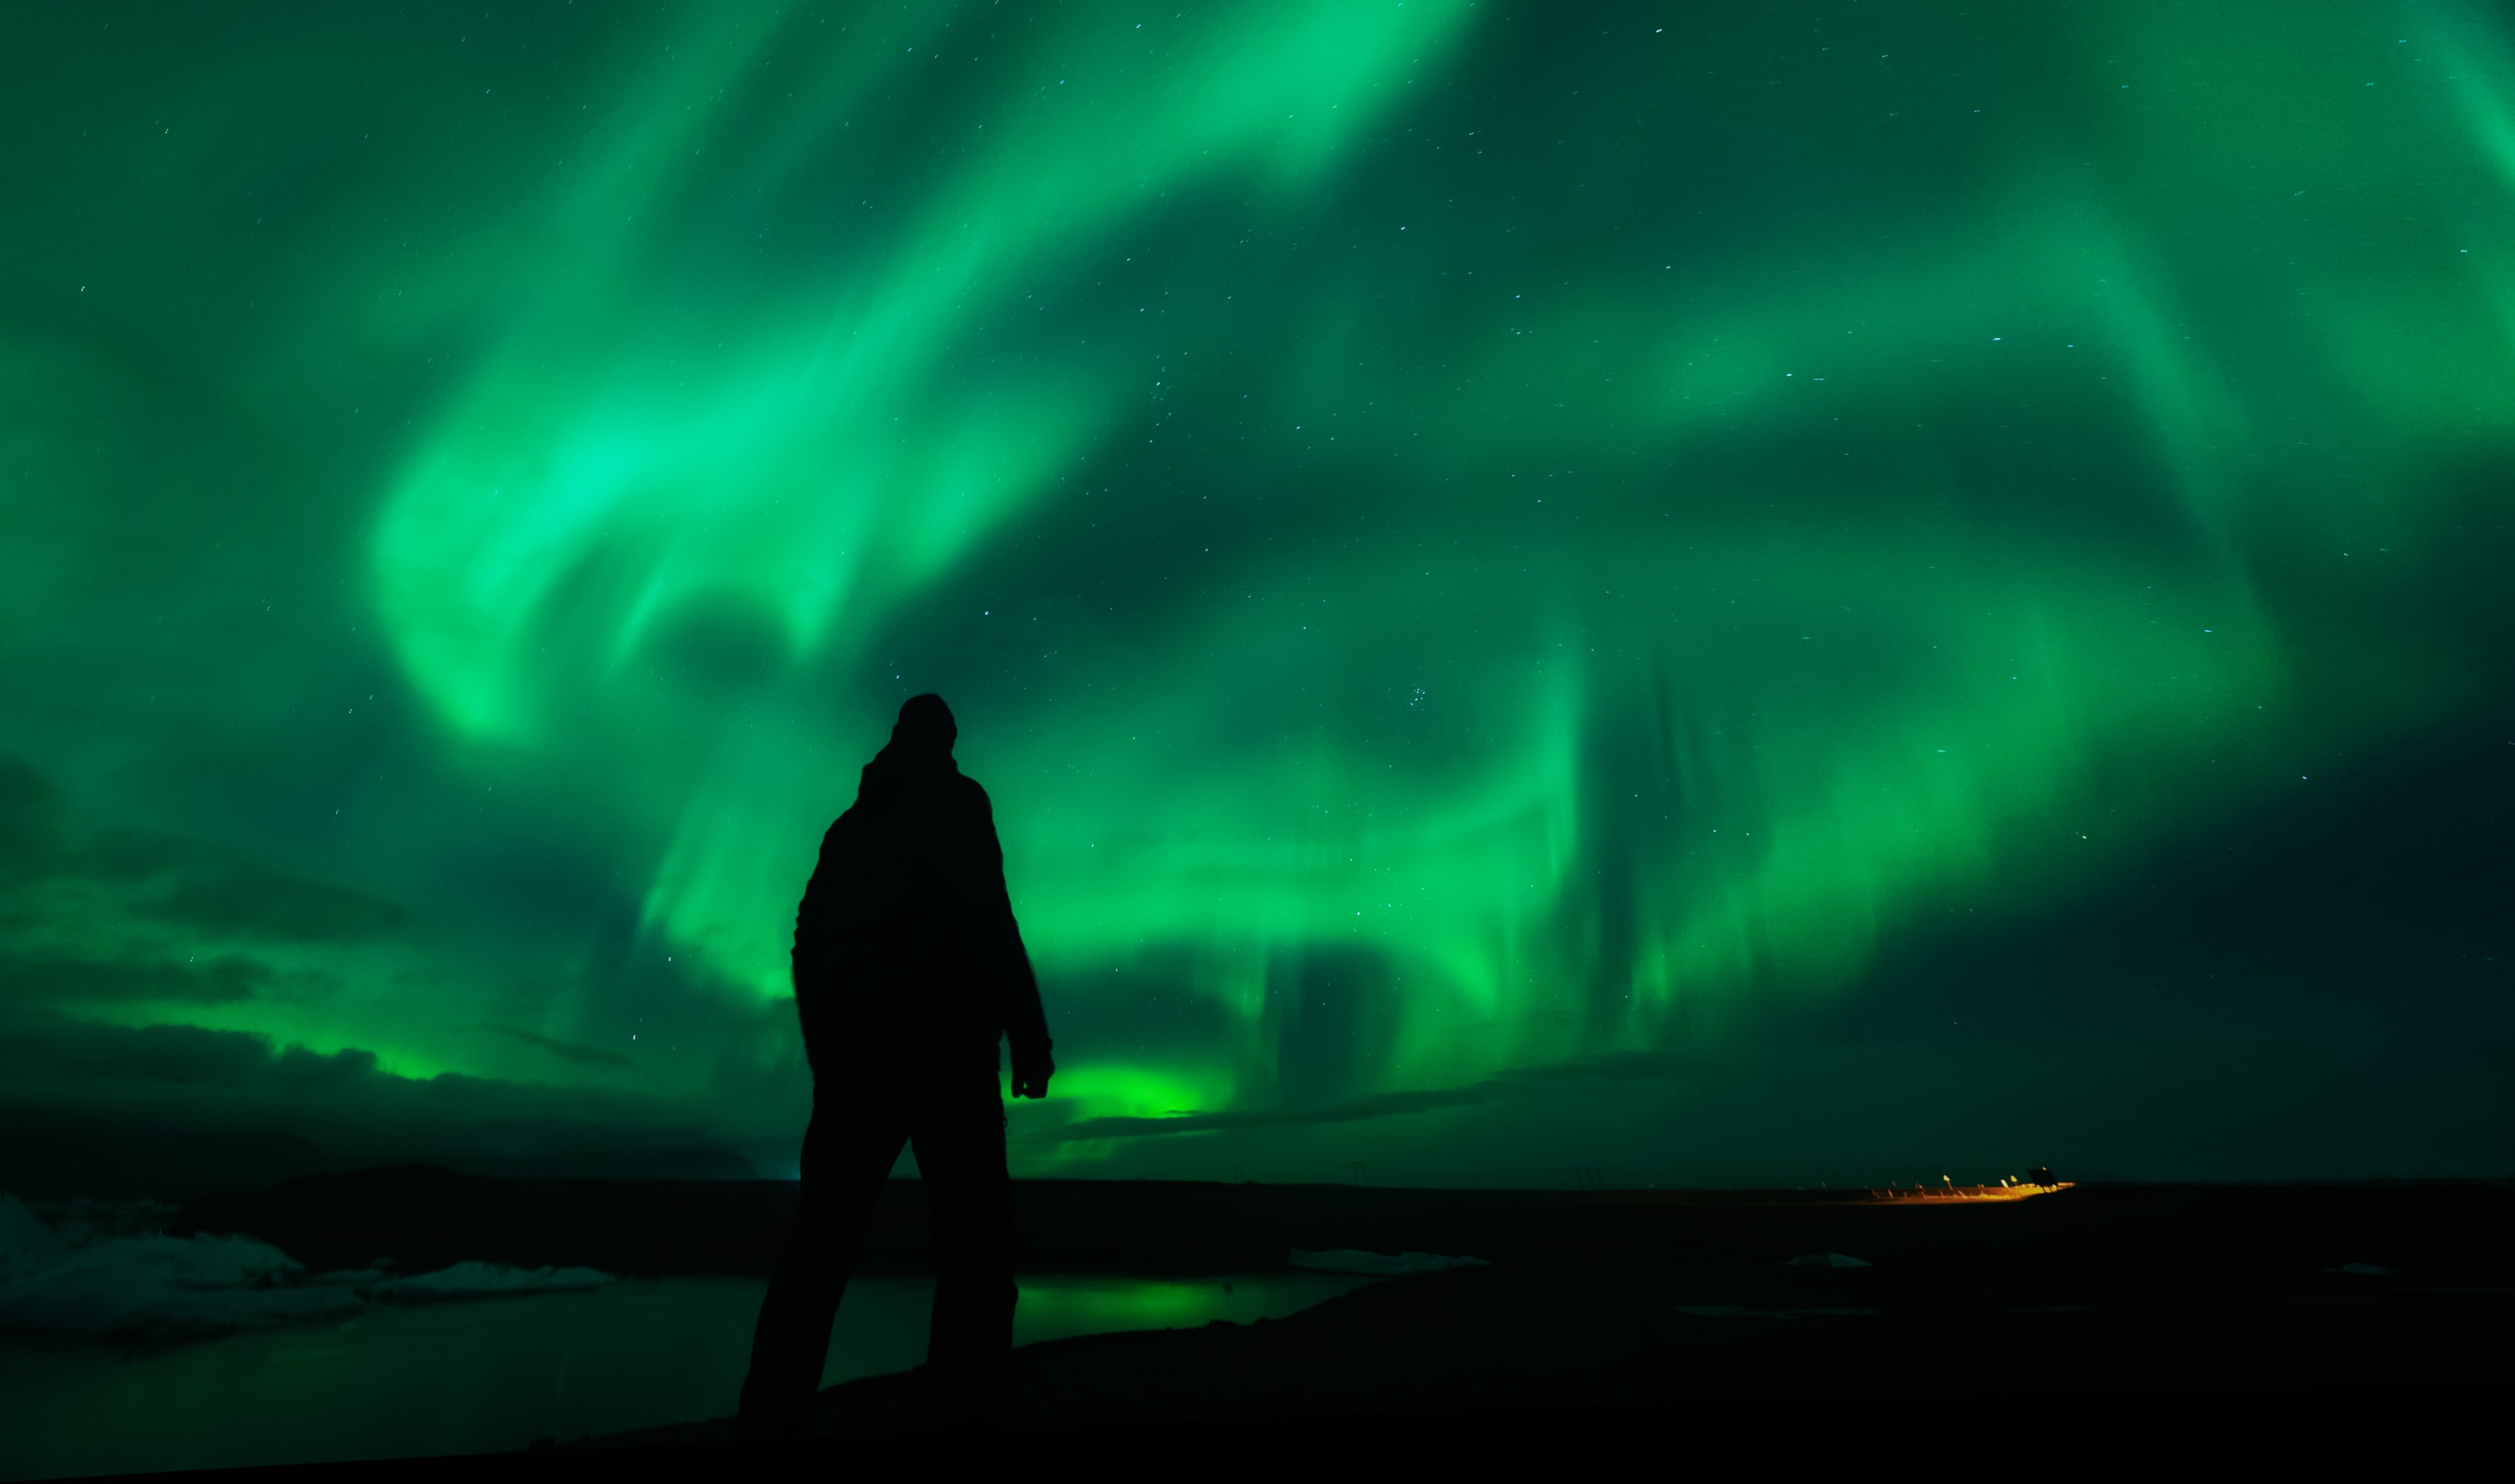
6. Embrace Minimalism
Auroras are often striking on their own, and sometimes less is more when it comes to the supporting elements in your composition. Some of the most powerful aurora photographs feature simple, solitary elements such as a single mountain ridge, a quiet cabin glowing softly in the distance, or a frozen lake glistening beneath the lights. These minimalist compositions strip away distractions, allowing the aurora to take center stage while creating a sense of quiet and wonder.
By thoughtfully considering these elements—foreground, horizon, leading lines, movement, reflections, and minimalism—you can elevate your aurora photography from ordinary to unforgettable. Each detail you include contributes to the story your image tells, connecting the vibrant lights of the sky to the grounded beauty of the earth below.
Working in Iceland’s Winter Conditions
Photography equipment behaves differently in the cold. Batteries drain quickly, condensation forms easily, and wind shakes the tripod.
1. Bring Spare Batteries Inside Your Jacket
Keep at least two spare batteries close to your body. Warm batteries last longer and function more reliably in freezing temperatures.
2. Use a Sturdy Tripod
Lightweight travel tripods struggle in wind. Choose a tripod with:
- Solid legs
- A reliable locking mechanism
- A broad stance for stability
If wind increases, weigh the tripod down by hanging your backpack from the center column.
3. Protect Your Lens From Condensation
Moving from a warm car to cold air can fog the lens.
To prevent this:
- Keep your camera outside during stops so it acclimates.
- Avoid breathing onto the lens.
- Use a lens hood to reduce frost buildup.
4. Dress in Layers
Cold affects comfort and concentration. Wear:
- Base layer
- Insulating mid-layer
- Windproof outer layer
- Warm gloves with thin inner liners
Comfort allows you to stay focused on composition rather than temperature.
Best Aurora Photography Locations in Iceland
Iceland’s varied landscapes provide countless viewpoints for northern lights photography, but some regions are particularly exceptional. These areas stand out because they offer open horizons, minimal light pollution, and more consistent weather patterns, which are all critical factors for capturing the aurora.
1. Þingvellir National Park
Þingvellir is a prime location due to its wide valleys, expansive open plains, and serene, calm lakes. On still nights, these lakes create a perfect surface for reflections, allowing you to capture both the aurora and its mirror image. Its strategic location away from the bright lights of major cities ensures a darker environment, giving the sky ample room to breathe and reveal the full intensity of the lights.
2. South Coast: Skógafoss, Reynisfjara and Dyrhólaey
The South Coast offers a wealth of dramatic foregrounds, where powerful waterfalls and unique black-sand beaches can be used to create stunning silhouettes against the dancing aurora. Skógafoss, in particular, adds elements of mist and scale when framed against the vibrant sky. Meanwhile, the cliffs of Dyrhólaey provide broad, unobstructed views toward the horizon, ideal for capturing the vastness of the aurora display.
3. Laugarvatn Area
This geothermal region is noteworthy for its combination of steady wind patterns and typically open skies. The warm air that rises from the geothermal ground can often help to thin or dissipate cloud cover, creating unexpected clearings and openings for photography even on nights that might seem unpromising elsewhere.
4. Snæfellsnes Peninsula
Famous for its rapidly changing microclimates, the Snæfellsnes Peninsula often experiences clear skies shortly after cloud systems pass through the area. It is a photographer's paradise, offering a diverse array of compositional elements, including:
- Dramatic coastal cliffs
- Rugged lava fields
- Secluded, isolated beaches
- The iconic silhouette of Kirkjufell mountain
This combination of features makes it one of Iceland’s most versatile and photogenic regions for aurora hunting.
5. Laugarás Lagoon
On calm nights, this lagoon transforms into a natural mirror, perfectly reflecting the sky above. These reflections enhance the graceful arcs of the aurora and create a powerful sense of peaceful symmetry in your photographs. Because it's situated at a distance from the more crowded tourist areas, photographing here often feels more relaxed and unhurried.
6. Jökulsárlón and Diamond Beach
At Jökulsárlón, the icebergs that drift slowly through the glacial lagoon catch the light of the aurora in a truly beautiful way. Nearby, Diamond Beach provides another magical opportunity, as the scattered ice formations on the black sand appear to glow from within beneath the curtains of the northern lights. Since these locations are situated far from Reykjavík, the conditions often feel more grounded, quiet, and profoundly connected to nature.
Understanding Iceland's Cloud Cover for Photography
Photography depends on clarity. Reading cloud cover forecasts helps you decide whether to stay in place or adjust your route.
Key principles:
- High clouds are workable.
- Mid-level clouds may break unexpectedly.
- Low clouds block visibility and require relocation.
- Wind direction reveals where clearings will form first.
Satellite loops show recent movement, giving insight into when the sky may open. Many of Iceland’s clearest aurora moments come from short windows between cloud layers.
Working With Moonlight
The phase of the moon significantly influences how the landscape appears in your aurora photographs. A full moon can be advantageous, illuminating mountains, coastlines, and other foreground elements with clarity. However, its bright light can diminish the intensity of fainter auroras.
On the other hand, a new moon is ideal for capturing strong, high-contrast aurora displays, allowing the Northern Lights to stand out dramatically against the dark sky. This often requires a slightly higher ISO setting to ensure the landscape remains visible. Ultimately, both lunar phases can lead to exceptional images. The choice depends on the specific atmosphere you wish to create in your photograph.
Post-Processing Tips for Aurora Images
Post-processing should refine the image, not alter its authenticity. The goal is to preserve natural color, maintain detail, and keep noise controlled.
Recommended adjustments:
- Exposure: Adjust gently for balance.
- White balance: Shift slightly cooler to enhance green tones.
- Contrast: Increase carefully to preserve the sky’s depth.
- Noise reduction: Apply moderatively at ISO 1600 and above.
- Sharpening: Use a light touch; auroras should feel soft, not overly crisp.
The best edits respect the character of the night.
How to Photograph Fast-Moving Auroras?
On some nights, the Northern Lights are anything but static. They move rapidly, forming dynamic spirals, shimmering curtains, or dramatic, sweeping arcs that race across the horizon. Photographing these fast-moving auroras requires a different approach to preserve their intricate details and prevent motion blur.
To effectively capture this spectacle:
- Reduce your shutter speed to 1–3 seconds. A shorter exposure freezes the motion, ensuring the fine details of the aurora's structure are clearly defined rather than blurred into a green smear.
- Increase the ISO slightly to compensate for the shorter shutter speed and maintain a proper exposure. Be mindful not to push it too high, as this can introduce unwanted noise.
- Keep your aperture wide open (e.g., f/2.8 or lower) to let in as much light as possible, which is crucial when using a fast shutter speed in dark conditions.
- Reframe your composition actively to anticipate and follow the aurora's movement path across the sky.
Fast-moving auroras reward photographers who can adapt their settings quickly without rushing the creative process.
How to Photograph Slow, Subtle Auroras?
On quieter nights when the aurora is less active, your approach should shift to capture its subtle beauty:
- Use longer exposures of around 10–15 seconds. This allows more time for the faint light to register on your camera's sensor, making the aurora appear more defined in your final image.
- Lower your ISO to minimize digital noise, which is less of a concern with a longer, more stable exposure. This results in cleaner, higher-quality images.
- Incorporate more of the landscape into your composition. With a slow-moving aurora, you have the opportunity to frame it against mountains, calm water, or snow-covered fields to add context and depth.
- Let the aurora drift gently across the frame during the long exposure. This can create a soft, ethereal ribbon of light that enhances the atmospheric quality of the scene.
Subtle auroras create a wonderfully atmospheric mood, and their gentle light often pairs beautifully with reflective surfaces like calm lakes or expansive, pristine snowfields.
The Value of a Curated Aurora Experience
Aurora photography demands precise timing, clear conditions, and a deep understanding of local weather behavior to capture its true beauty. However, navigating these complexities can be overwhelming. A curated experience eliminates the guesswork, giving photographers the freedom to focus entirely on their craft and creativity without worrying about logistics.
The Iceland Tour Company takes the stress out of aurora photography by designing routes that seamlessly follow cloud movements, regional wind patterns, and local microclimates. Each destination is selected with great care, ensuring locations have wide, open horizons, minimal light pollution, and a pace that allows for thoughtful composition.
Whether it’s a remote cliffside or a serene lakeshore, the stops provide the ideal settings for capturing stunning images. This steady, detail-oriented approach transforms the process into one of calm immersion, allowing photographers to connect deeply with the moment and the natural wonder before them.
Preparing for the Night: A Photographer’s Checklist
A simple, calm approach is key to staying present and fully appreciating the experience of photographing the aurora. Taking your time helps you capture the magic of the evening without feeling rushed or overwhelmed.
Essential gear:
- Camera with manual settings: A camera that allows full control over settings like ISO, shutter speed, and aperture is essential for capturing the aurora’s details.
- Wide, fast lens: A lens with a wide-angle view and a large aperture (like f/2.8 or lower) works best to let in enough light during low-light conditions.
- Sturdy tripod: Stability is crucial for long exposures, so invest in a durable tripod that can withstand wind.
- Spare batteries: Cold weather drains batteries quickly, so bring extras and keep them warm in an inner pocket.
- Remote shutter or timer: This helps eliminate camera shake, ensuring crisp, sharp images during long exposures.
- Headlamp with red light mode: Red light preserves your night vision while giving you enough visibility to adjust settings and move safely.
- Extra layers of clothing: Dress warmly with multiple layers, including gloves and a hat, since you'll be outdoors in cold conditions for extended periods.
- Microfiber cloth for frost removal: Condensation and frost can build up on your lens, so a microfiber cloth is essential for keeping your equipment clear.
Pre-night routine:
- Set focus before leaving a well-lit area: Autofocus often fails in the dark, so pre-focusing on a distant object (like a streetlight or the moon) ensures your images are sharp.
- Check exposure using test shots: Take a few test photos to balance ISO, shutter speed, and aperture, ensuring you’re ready to shoot as soon as the aurora appears.
- Study cloud forecasts and wind direction: Knowing the weather conditions helps you avoid obstructed skies and find the clearest views.
- Choose at least two alternate viewing areas: Having backup locations gives you flexibility in case your primary spot is crowded, cloudy, or has unexpected lighting.
During the night:
- Adjust shutter speed based on aurora speed: Slower auroras can handle longer exposures, while fast-moving displays might require shorter shutter speeds to avoid blurring details.
- Reframe often to incorporate new movement: The aurora constantly shifts and evolves, so regularly adjusting your composition keeps your shots dynamic and fresh.
- Keep batteries warm: Store spare batteries in an inner pocket close to your body heat to maximize their lifespan in the cold.
- Slow your pace: Take a thoughtful, deliberate approach to your adjustments. Focus on quality over quantity—well-composed shots are always more impactful than rushed ones.
Tips for Capturing Amazing Aurora Photographs
The natural phenomenon of the aurora borealis, or northern lights, is a breathtaking sight that attracts many photographers and travelers. To capture this mesmerizing display of lights in all its beauty, it takes more than just pointing your camera at the sky and pressing the shutter button. Here are some tips to help you capture amazing aurora photographs:
- Do your research: Before embarking on your journey to photograph the aurora, do some research on the best locations and times to see them. These can vary depending on factors such as time of year, weather conditions, and geographical location.
- Use a sturdy tripod: As with any low-light photography, using a sturdy tripod is essential for capturing sharp images of the aurora. The long exposures required to capture the faint lights can easily result in blurry photos if your camera is not stabilized.
- Experiment with different shutter speeds: Depending on the intensity and movement of the aurora, you may need to adjust your shutter speed to get the best shot. Typically, a longer exposure time (around 10-30 seconds) will result in brighter and more defined lights, while a shorter exposure time (around 2-5 seconds) can capture more subtle movements.
- Use manual focus: Due to the low light conditions, autofocus may struggle when trying to focus on the aurora. It's best to switch to manual focus and use the infinity setting for sharp images.
- Avoid light pollution: Light pollution from nearby cities or streetlights can greatly reduce the visibility of the aurora in your photos. Try to find a location away from these sources of light for clearer shots.
- Experiment with different ISO settings: ISO determines the sensitivity of your camera's sensor to light. Higher ISO values (e.g. 800 or above) can result in brighter images, but they can also introduce more noise. Experiment with different ISO settings to find the right balance between brightness and image quality.
FAQs
How do I set up my camera for aurora borealis photos in Iceland?
Use manual settings with a wide angle lens or wider lens, manual focus, and night mode. A remote trigger makes taking photos easier in cold conditions. All this helps capture sharp aurora shapes with less light pollution.
Which tools help me choose the best spots each night?
Check the aurora forecast, KP index, weather forecast, and websites that list beautiful places away from the beaten path. Google Maps also helps explore nearby hidden gems in your local area at your own pace.
What camera equipment should I bring on the whole trip?
Bring a wider lens, sturdy tripod, remote trigger, and warm gear. Most people forget extra batteries, but they are totally worth packing.
Can I explore locally for last minute photography ideas?
Yes. Explore nearby sites, visit restaurants or beer gardens, then head out for cool stuff when skies clear.
Are guided small group tours useful for photography?
Small group tours offer ideas, detailed planning, and access to other places you might not know existed. A day trip into northern Norway style landscapes in Iceland is often totally worth it.
Conclusion
Photographing the northern lights in Iceland takes preparation, technique, and a willingness to move with the rhythm of the landscape. The night sky shifts constantly as clouds drift, winds open new windows of visibility, and auroras brighten without warning. By understanding how your camera reads low light and experimenting with shutter speed, aperture, ISO, and thoughtful composition, you can capture each display with clarity and confidence.
The strongest photos often come not from chasing predictions but from staying present, patient, and positioned where the sky is most likely to break open. A curated experience that blends a soothing lagoon soak, local tastings, and flexible countryside routing brings all these elements together. Instead of watching forecasts and cloud charts, photographers can focus fully on the sky, the foreground, and the exact moment the colors rise above the horizon.
Iceland’s wide, open landscapes create a perfect canvas for the subtle beauty of winter nights. With the right techniques and an understanding of conditions, your camera becomes an extension of the experience, capturing the auroras with purpose and ease. For those who want expert guidance woven into their photography adventure, Iceland Tour Company provides thoughtfully crafted northern lights journeys that elevate every shot.